David the Village Sweep, Inc
(908) 756-1807
info@villagesweepnj.com
1812 Front Street
Scotch Plains, NJ 07076
NJ Home Improvement Contractor License #13VH00821500
CSIA Certification #2794

Chimney Maintenance For Homeowners
TEN CHIMNEY CHECKS YOU CAN DO YOURSELF
Here are ten things you can do to inspect your own chimney. Your inspection isn’t a substitute for having a professional, certified chimney sweep do an inspection. A certified chimney sweep will look at your chimney with a more discerning eye and will have tools to inspect areas that are not accessible to you. But following these inspection steps may alert you to potential problems.
Equipment needed: Flashlight, work gloves, eye protection, good set of binoculars. (We climb to the top of the chimney when we do our service; we do not recommend that you attempt this.)
Before going through the checks, you may want to learn the components of your fireplace and chimney. You can visit the Chimney Safety Institute of America’s website and spend a few minutes getting acquainted with the parts and names of your fireplace and chimney. We’ve made it easy for you; just click on the following link: Anatomy of your Fireplace.
Checks to Do Inside the House
#1 Check for Soot Buildup:
Chimney sweeps recommend a thorough cleaning when an 1/8” of soot has built up on the walls of the smoke chamber—the area directly above your damper. This may be difficult for you to see, but if you have 1/8” of soot on your damper, it is a good bet that the chimney needs cleaning.
#2 Inspect Your Damper:
In most cases, you can easily see your damper by looking up through your fireplace opening. Use a flashlight and be careful that soot doesn’t fall in your eyes. Operate the handle to see how it opens and closes. Dampers prevent heat loss when your fireplace is not in use. If the damper doesn’t close tightly, you are losing heat.

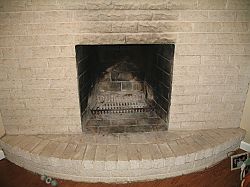
#3 Examine Your Fireplace Mortar & Bricks:
There may be gaps in the mortar between the bricks in the fireplace. Often the mortar wears out and needs to be replaced with new, high temperature mortar. If the bricks themselves are badly damaged, you may need a mason to make repairs. Do you see efflorescence on the walls inside the fireplace? Efflorescence looks like “white mold or stain” on the brick. This indicates water damage.
#4 Check for Facing Cracks:
Often, cracks develop between the inner and outer hearth and all around the bricks forming the fireplace opening. Look particularly just on the inside of the fireplace lintel. (Use your flashlight and be careful that soot doesn’t fall in your eyes.) Cracks behind the lintel may channel heat up to a wooden mantel.
#5 Look at Your Ash Dump Door:
Many fireplaces have a metal door in the floor of the fireplace (the inner hearth) to deposit ashes. If the door is missing or damaged, hot ambers may fall into the ash pit below.
#6 Verify a Proper Fireplace Draft:
If there is a smoke stain above the fireplace (the bricks are dark with soot), it indicates that smoke has come back into the room. A dark stain suggests a chronic problem.
Checks to Do in the Basement
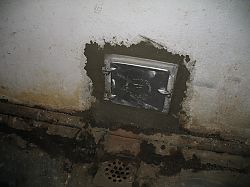
#7 Examine Your Ash Cleanout Door:
Most typically, this is a metal door about 12” square located directly under your fireplace. It is probably behind your heating appliances, but it may be outside or in a garage, depending on how your house is built. Make sure this door closes tightly so hot embers don’t spill out. Keep combustibles (newspaper, cardboard boxes, paint cans, aerosol sprays) at least 18” from them.
#8 Look at Your Vent Pipes: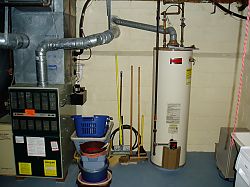
Most homes have a furnace or boiler and a water heater venting into the chimney. The vent pipes leading from these appliances are often made of thin, galvanized steel. If you see rust on the outside of these pipes, they are failing and should be replaced since they rust from the inside out. While you are looking at these, pipes, check how they enter the chimney. They should be sealed with no gaps. The water heater vent should enter the chimney above the larger vent for the furnace or boiler.
Checks to Do Outside
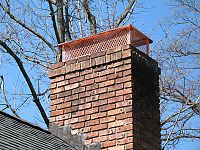
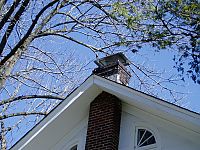
#9 Look for Caps on Your Chimney:
Stand back from your chimney and look at the top with your binoculars. You should have screened, metal caps covering each of your flues. Or you may have one large cap that covers two or more flues. If the caps are installed correctly, they keep out animals, debris, and moisture. The screened base breaks up sparks. The caps should sit squarely on top; there should be no gaps where animals can squeeze through an opening.
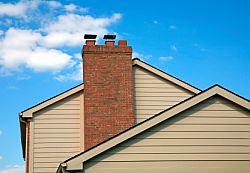
#10 Examine the Outside Bricks and Mortar:
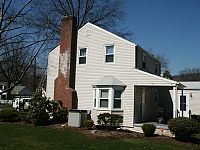
Most people are not comfortable climbing to the top of their chimney, but you can tell a lot from the ground. Scan the bricks with your binoculars. Missing or damaged bricks are obvious. If you have a white stain on your chimney (efflorescence), it is an indication that water is seeping into the structure. Efflorescence may be an indication that water is seeping through from the outside, or condensation from the furnace or water heater may be damaging the structure.